Showing posts with label SPREADS AND CONDIMENTS. Show all posts

Sunday, June 16, 2013

TRISHA YEARWOOD'S STEAK MARINADE

recipe from Trisha's home cooking/ foodnetwork.com
INGREDIENTS
1 CUP KETCHUP
1/2 CUP PINEAPPLE JUICE
1/4 CUP CIDER VINEGAR
1 TBLSP. MESQUITE FLAVOR LIQUID SMOKE
2 TSP.  ONION POWDER
1 TBLSP. GROUND CUMIN
1 TSP. CRUSHED RED PEPPER
2 TSP. DRIED OREGANO
3 CLOVES GARLICHONEY TO COAT
2 RIB EYE STEAKS
SEA SALT AND PEPPER

DIRECTIONS
WHISK TOGETHER THE KETCHUP, PINEAPPLE JUICE, CIDER VINEGAR, LIQUID SMOKE, ONION POWDER, CUMIN CRUSHED RED PEPPER, OREGANO AND GARLIC IN A SHALLOW BAKING DISH.  PUT A LAYER OF HONEY ON BOTH SIDES OF THE STEAKS AND PLACE THE STEAKS IN THE MARINATE, TOSSING TO COVER BOTH SIDES.  LEAVE 2-4 HOURS.

REMOVE THE STEAKS FROM THE MARINADE AND PAT DRY.  SPRINKLE WITH SALT AND PEPPER AND GRILL TO DESIRED DONENESS.

Tuesday, April 30, 2013

POPEYE PEANUT BUTTER HUMMUS

Popeye Peanut Butter Hummus

This is how it is suppose to look
 Serves 4
1 can (15 oz) chickpeas, rinsed and drained
3 Tbsp peanut butter, preferably organic
2 Tbsp fresh lemon juice
2 tsp extra virgin olive oil
1/2 tsp cumin
1 clove garlic, mashed with a pinch of salt
5 oz (½ pkg) frozen chopped spinach, thawed and squeezed dry
COMBINE all ingredients except spinach in food processor.
ADD 1/3 cup warm water and ½ tsp kosher salt and process until smooth. Quickly pulse in spinach until combined.

This is what mine looked like

  TRANSFER to serving bowl. 
 WHEN I STARTED COMAPRING THE PICTURE IN THE RECIPE TO WHAT MY  HUMMUS LOOKED LIKE I REALIZED THAT I ACCIDENTLY ADDED THE WHOLE CONTAINER OF FROZEN SPINACH AND I ACTUALLY  REALLY LIKE IT.  I'M NOT SURE THAT IT AFFECTED THIS RECIPE IN A NEGATIVE WAY AND I FIGURE THIS WAY I DIDN'T HAVE TO FIGURE OUT WHAT TO DO WITH OR WASTE THE OTHER HALF OF THE THAWED/FROZEN SPINACH. 
Read more: http://www.prevention.com/food/cook/peanut-butter-recipes#ixzz2Rn0QzwIz

Thursday, October 4, 2012

FREEZING HERBS

How to Freeze Fresh Herbs: Rosemary and Thyme

This post is about how I freeze rosemary and thyme from my garden to use in the winter.

Even though it's still quite warm in Utah, I can feel the nights getting a bit cooler, and I know it's not that long until the garden goodness has to either be preserved or lost. I hate losing anything that comes from my garden, and try to freeze as much as possible. Since I have lots and lots of herbs, a few years ago I started to experiment with freezing them to see if I could preserve the flavor enough to make it worthwhile to use the herbs in the winter. I'm no expert, but I've learned a few tricks.


If you're going to try freezing herbs, first it helps to understand the difference between soft herbs and hard herbs. A while ago Helen from Beyond Salmon wrote an excellent post on preserving and using herbs in which she explained this quite well. Basically soft herbs are things like basil, cilantro, parsley, oregano, and mint which are either eaten raw or added only for a few minutes of cooking. I've written earlier about how to freeze fresh basil, and I suspect that many of the other soft herbs can be frozen that way also, although basil combines especially well with the olive oil.

Hard herbs are things like rosemary, thyme, savory, and sage which are suitable for long cooking times. The two things from this list that I've had great luck freezing are rosemary and thyme. I actually discovered how to do this somewhat by accident when I cut the branches off my rosemary and thyme bushes one fall and didn't have time to pick the leaves off. I washed the herbs, then put the stems into a ziploc bag and put it in the freezer, not sure what would happen.

I was delightfully surprised when the frozen leaves fell off the stems, and even happier when I tried using some of the frozen rosemary and thyme leaves and discovered they were nearly as good as fresh. Try this if you have rosemary and thyme in your garden and live where there's a cold winter, and I think you'll like the result.

Cut some rosemary branches.

Cut some thyme branches.
Herbs should be washed in cold water and
either spun dry or blotted dry with paper towels.
Put rosemary in small Ziploc bag.
Use a separate Ziploc bag for the thyme.
Let thyme and rosemary stay in the freezer for several weeks.

After a few weeks, take ziploc bag out of the freezer and use a rolling pin to roll over the bag containing the herbs. You should see a significant amount of leaves come loose from the stems. If some leaves don't come off, you can remove the loose leaves and freeze the others a bit longer, or pick the rest off by hand.

This rosemary has been frozen for nearly a year
and is still green and very fragrant.

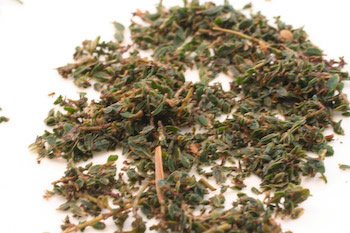
Thyme is a bit more fragile than rosemary, but this thyme is
still great after nearly a year in the freezer.
After I've separated the leaves from the stems, I like to store my
frozen herbs in canning jars which have a lid that seals well.
This keeps moisture away from the herbs.
(The jars go back in the freezer.)

That's how easy it is to preserve the rosemary and thyme from your garden to use in wonderful soups and stews all winter long. Use the frozen leaves in any recipe calling for fresh rosemary or thyme. For recipes created using dried thyme or rosemary, use about twice as much of the frozen herbs as you would the dried version.

http://www.kalynskitchen.com/2006/08/how-to-freeze-fresh-herbs-rosemary-and.html#

Monday, July 30, 2012

SKINNY BASIL PESTO


IF YOU HAVEN'T NOTICED I AM ON A BASIL KICK AND WHEN I RUN ONTO A RECIPE THAT I WANT TO  TRY/KEEP THEN IT IS GETTING POSTED.  THIS ONE PEEKED MY CURIOSITY WHEN I SAY SKINNY IN THE TITLE BECAUSE I AM ALWAYS LOOKING FOR WAYS TO KEEP THINGS HEALTHY.  I WILL LET YOU KNOW WHEN THE VERDICT IS IN HOW IT TASTES.
FROM  Skinnytaste.com
Servings: 5 Serving Size: 1 tbsp • Old Points: 2 pts •
Points+: 2 pts
Calories: 86 • Fat: 8.3 g • Protein: 2.3 g • Carb: 0.8 g •
Fiber: 0.3 g • Sugar: 0 g
Sodium: 94 mg (without salt)

Ingredients:
1 cup basil
1 clove garlic
1/4 cup grated parmesan
salt & pepper to taste
2 1/2 tbsp olive oil
Directions:
In a food processor pulse basil, garlic, parmesan cheese, salt and pepper until smooth. Slowly add the olive oil while pulsing. Store in a sealed container and refrigerate until ready to use or you can freeze this in ziplocks bags to use at a later

Tuesday, July 24, 2012

PESTO AND HERB BUTTERS

I THINK THAT BASIL IS BY FAR ONE OF MY MOST FAVORITE HERBS.  EARLIER THIS SUMMER I WAS SO WORRIED THAT MY BASIL WAS NOT GOING TO GROW, BUT LOW AND BEHOLD I THINK THAT THIS IS YEAR IS GOING TO BE ONE OF MY BEST.  SO IT IS TIME TO START HARVESTING IT AND I AM LOOKING FOR RECIPES THAT WILL PRESERVE MY BASIL SO I CAN ENJOY IT THE REST OF THE YEAR.  I LOVE A GOOD PESTO AND I FOUND THIS RECIPE AND IT IS A TRADITIONAL PESTO RECIPE BUT WITH SOME GREAT TIPS THAT I HAVE NEVER SEEN BEFORE.


Basil Pesto

FROM: Michael Chiarello's Casual Cooking Cookbook
Pasta with pesto is a good lesson in why Italians so often insist on adding a spoonful of pasta cooking water to pasta sauce. Try it here and you will see how creamy the pesto becomes on the pasta.

If your pesto typically turns army green shortly after you make it, you’ll appreciate the beauty of this version. I blanch the basil briefly to set the color, and I add a pinch of powdered ascorbic acid (vitamin C), which keeps the pesto from oxidizing.

Ingredients

Serves: Makes about 3/4 cup, enough for 1 pound pasta.
2 cups firmly packed fresh basil leaves
1/3 cup olive oil
3 tablespoons pine nuts, toasted
1/2 teaspoon minced garlic
Sea salt, preferably Gray salt
Freshly ground black pepper
Pinch of powdered ascorbic acid (vitamin C)
1/4 cup freshly grated Parmesan cheese

Directions

Prepare an ice water bath in a large bowl, and bring a large pot of water to a boil. Put the basil in a large sieve and plunge it into the boiling water. Immediately immerse all the basil and stir so that it blanches evenly. Blanch for about 15 seconds. Remove, shake off the excess water, then plunge the basil into the ice water bath and stir again so it cools as fast as possible. Drain well.

Squeeze the water out of the basil with your hands until very dry. Roughly chop the basil and put in a blender. Add the garlic, salt and pepper to taste, olive oil, pine nuts, and the vitamin C, if using. Blend for at least 30 seconds. In this way the green of the basil will thoroughly color the oil. Add the cheese and pulse to combine. The pesto will keep several days in a tightly sealed container in the refrigerator.

Tips

I use pure olive oil for pesto so the clear flavor of the herb dominates. If you want to freeze pesto, omit the nuts and cheese.
Michael’s Notes: Don’t try to make this pesto in a food processor. The processor just throws it around the bowl. A blender does a much better job. Be sure to thin the pesto with some of the hot pasta water before tossing it with pasta.


Basil Chive Butter
Ingredients

Serves: Yields: 1 1/2 cups
4 cups firmly packed fresh basil leaves
1/8 teaspoon powdered ascorbic acid (vitamin C)
Sea salt, preferably gray salt
2 sticks (16 tablespoons unsalted butter), at room temperature
Freshly ground pepper
3 tablespoons thinly sliced fresh chives
 Directions

Blanch the basil in boiling salted water just until wilted, about 10 seconds, then drain and transfer to ice water. Drain again and squeeze dry. Chop roughly.
Puree the basil, ascorbic acid, salt and pepper in a food processor. If the mixture is too dry to puree, add just enough water to ease the process. Add the butter, in tablespoon-sized pieces, and puree until smooth and well blended. Taste and add more salt if desired. Transfer to a bowl and stir in the chives by hand.

Refrigerate until firm enough to shape into a log. Put an 18-inch sheet of aluminum foil on your work surface. Spoon the butter down the center of the foil into a log about 1 1/2 inches in diameter. Enclose in foil and twist the ends to make a sealed log, like a Tootsie Roll. Refrigerate for up to 1 week, or freeze for up to 6 months.

Roasted Garlic-Thyme Butter

You'll never run out of ideas for using this seasoned butter, which you can keep in the freezer and slice as you need. I love it on mashed potatoes and tucked into baked potatoes, or as a finishing butter for risotto, swirled in at the end. You can also toss it with fresh pasta and Parmesan on one of these evenings when you don't feel like cooking, or let a nugget of it melt on a grilled New York steak. Imagine how good a burger would be if the toasted bun were spread with this butter.


Ingredients

Serves: Makes 1-1/4 cups
1 large or 2 small heads garlic, separated into cloves and peeled
Extra-virgin olive oil to cover
1 cup (1/2 pound) unsalted butter, at room temperature
1 tablespoon finely minced fresh thyme
Sea salt, preferably gray salt
Directions

Put the garlic cloves in a saucepan with just enough olive oil to cover them. Place over low heat and simmer until the cloves are soft and golden, 30 to 40 minutes. With a slotted spoon, scoop the garlic into a bowl, then mash to a puree. Immediately strain the oil through a coffee filter and reserve.

Process the butter in a food processor until smooth and creamy. Add 1/4 cup of the garlic puree (save any extra for spreading on bread), 1 1/2 tablespoons of the reserved garlic oil, the thyme, and a pinch of salt. Process until well blended. Taste and add more salt if needed.
Refrigerate until firm enough to shape into a log. Put an 18-inch sheet of aluminum foil on your work surface. Spoon the butter down the center of the foil into a log about 1 1/2 inches in diameter. Enclose in foil and twist the ends to make a sealed log, like a Tootsie Roll. Refrigerate for up to 1 week, or freeze for up 6 months.